Quickstart
Five minutes from install to a validated fence takeoff. You'll need conmcp installed first.
1. Generate the sample plan
conmcp ships a synthetic 4-sheet commercial plan set — "Oakridge Commerce Park, Phase 2, Perimeter Security Fence Improvements" — with realistic fence runs, gates, details, and a gate schedule. No real client plans are ever committed to the repo.
conmcp sample
That writes sample_plan.pdf to the current directory.
2. Look at it from the CLI
The CLI mirrors the MCP tools, so you can see what the server extracts before any LLM is involved.
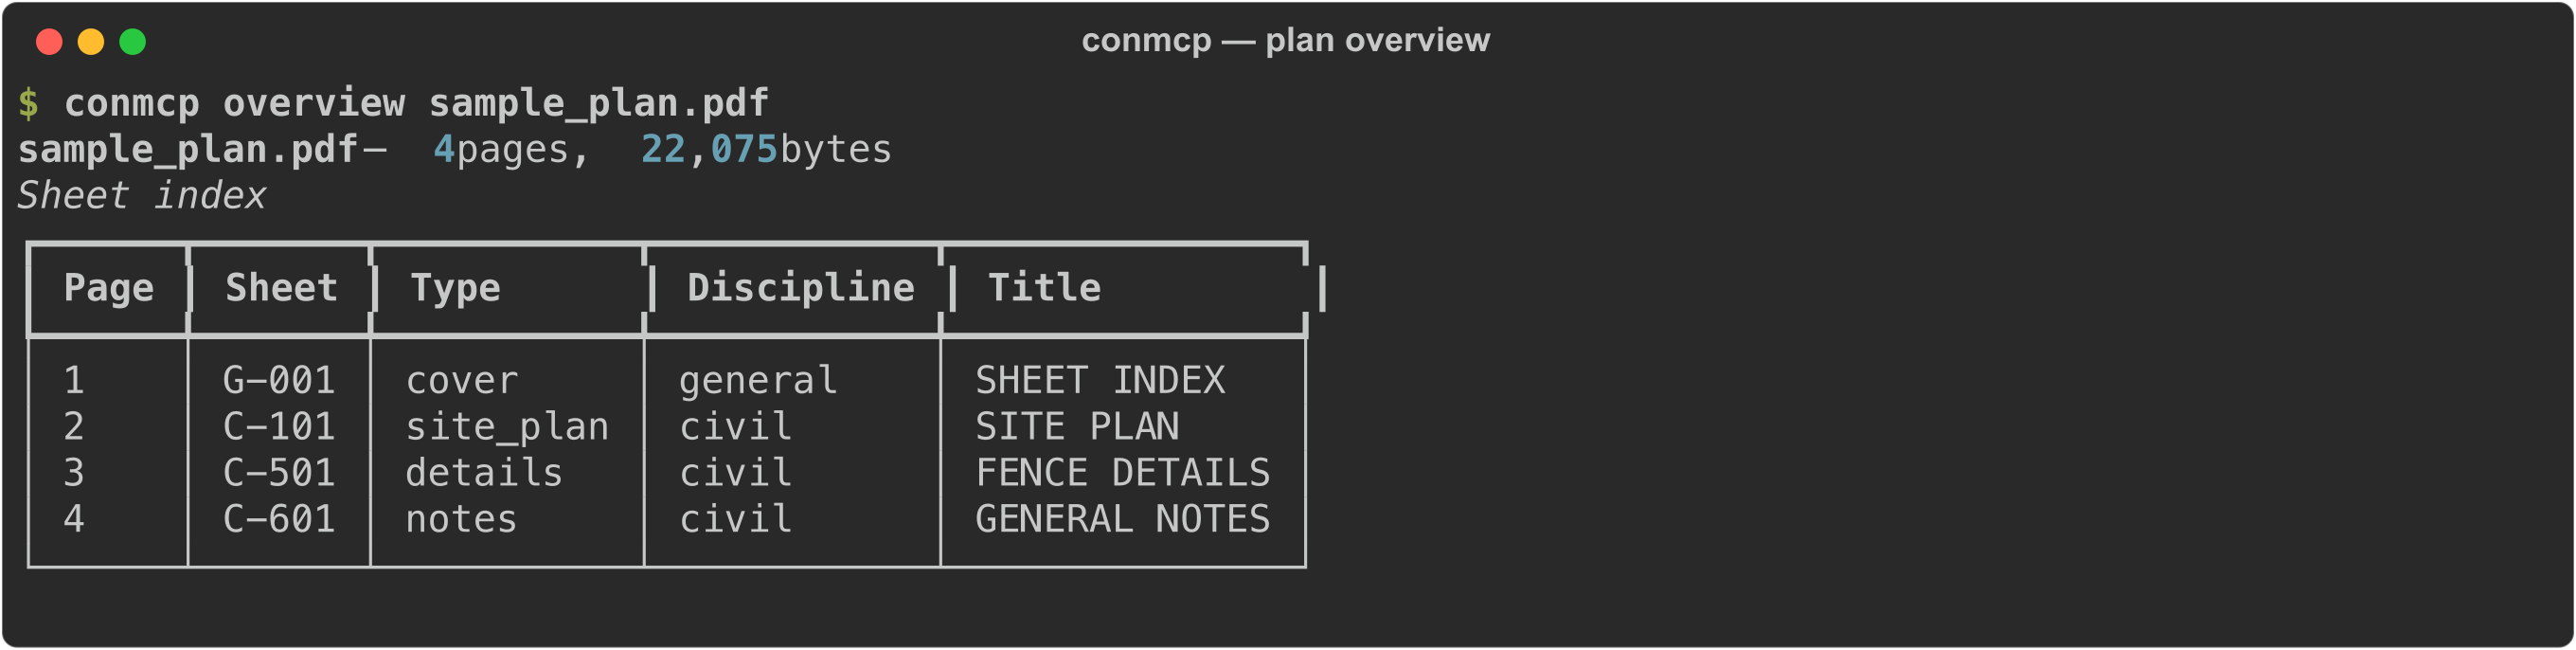
Sheet index:
conmcp overview sample_plan.pdf
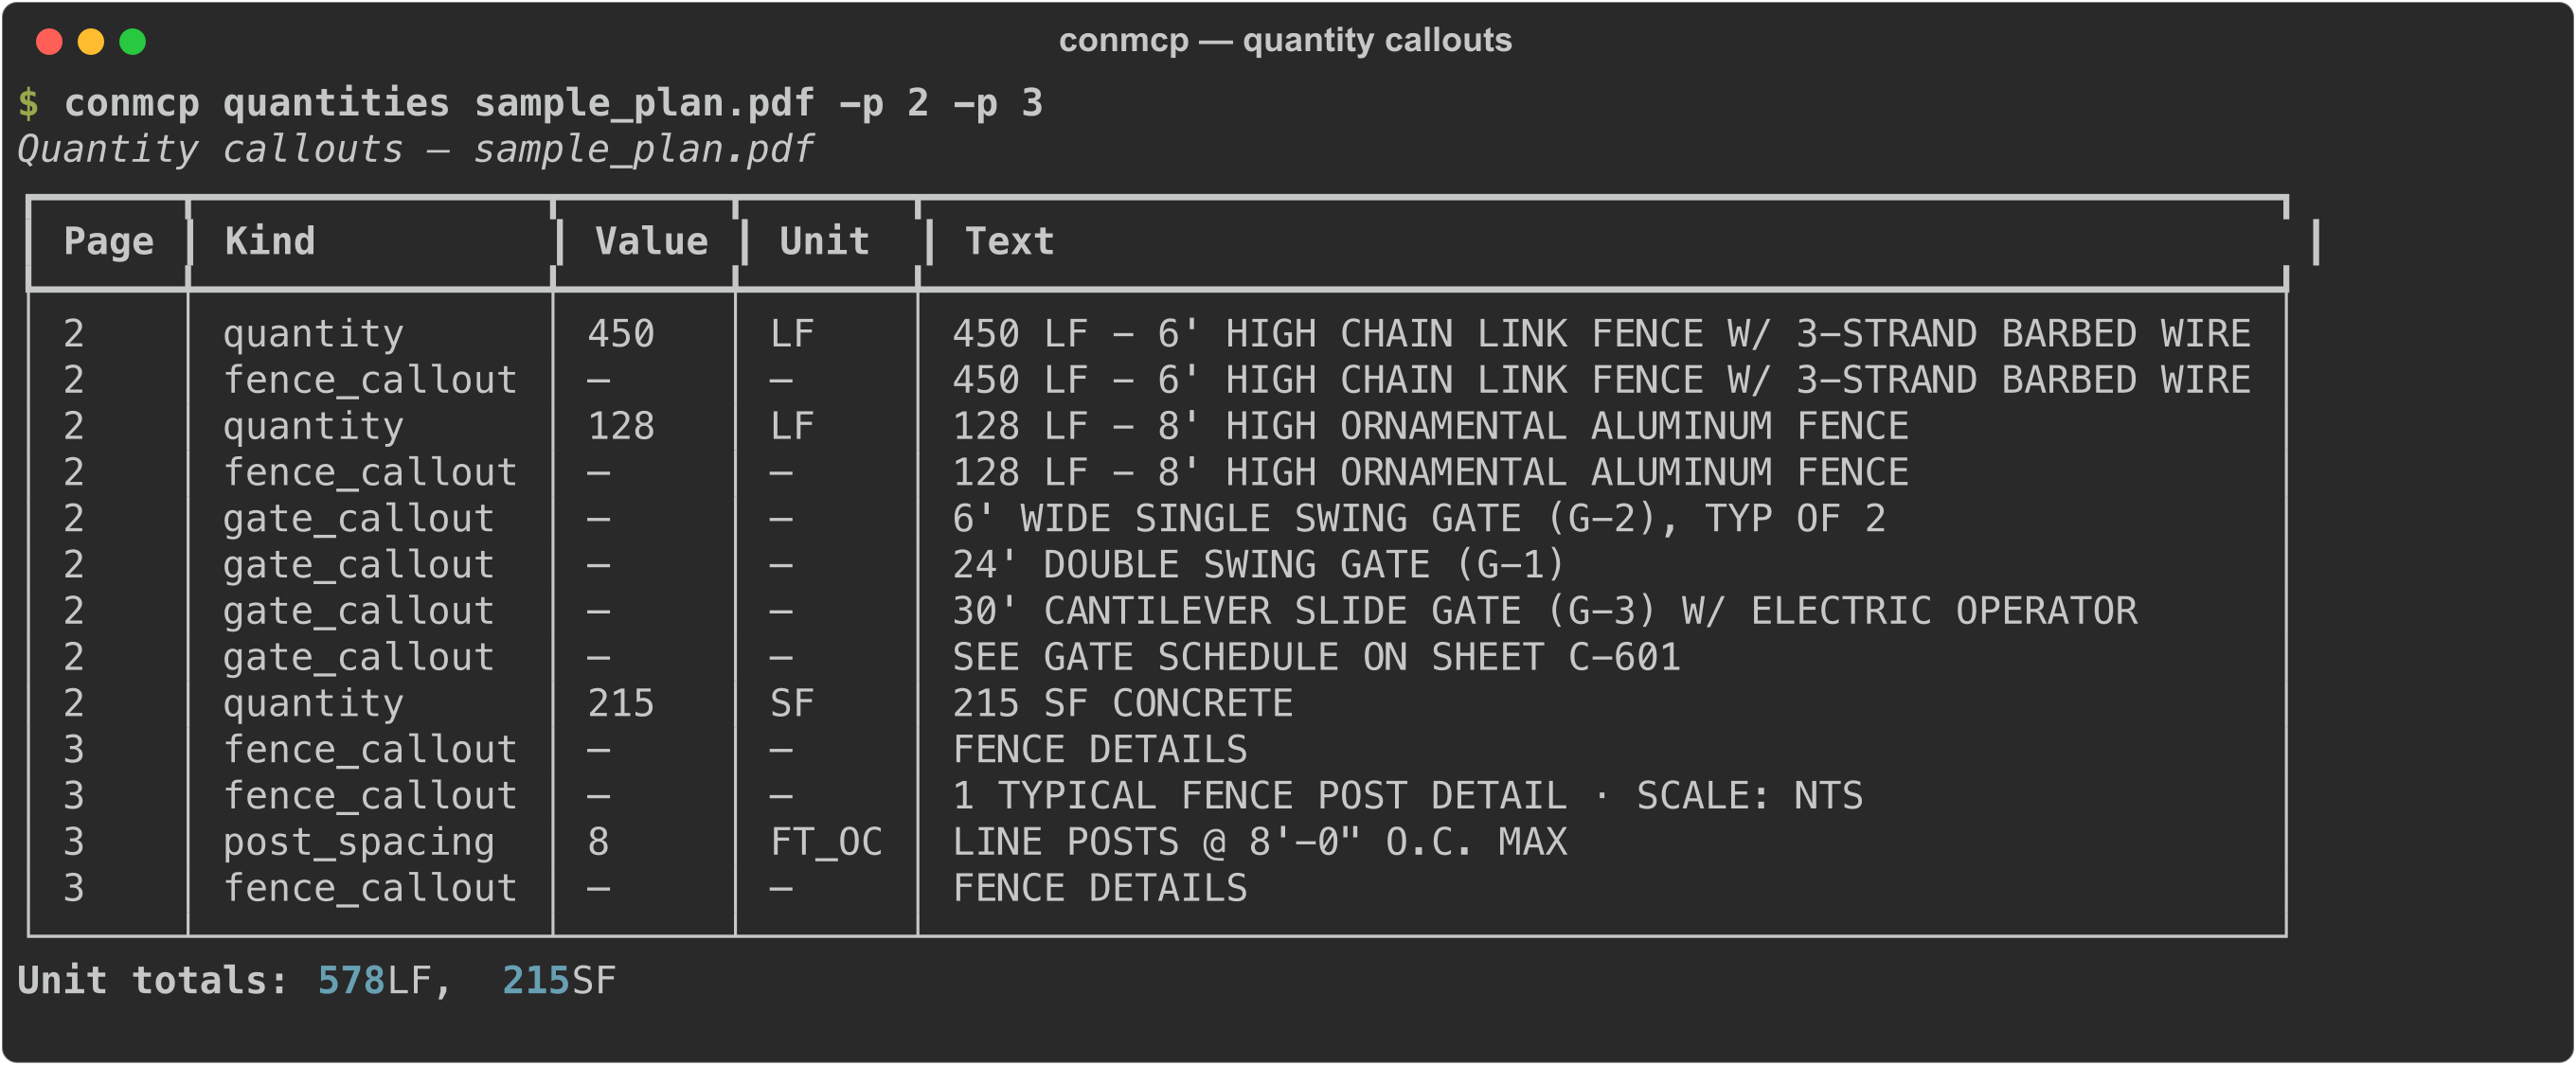
Quantity callouts — the deterministic pattern matches (LF/SF/EA quantities, fence callouts with height and material, gate callouts, post spacing):
conmcp quantities sample_plan.pdf
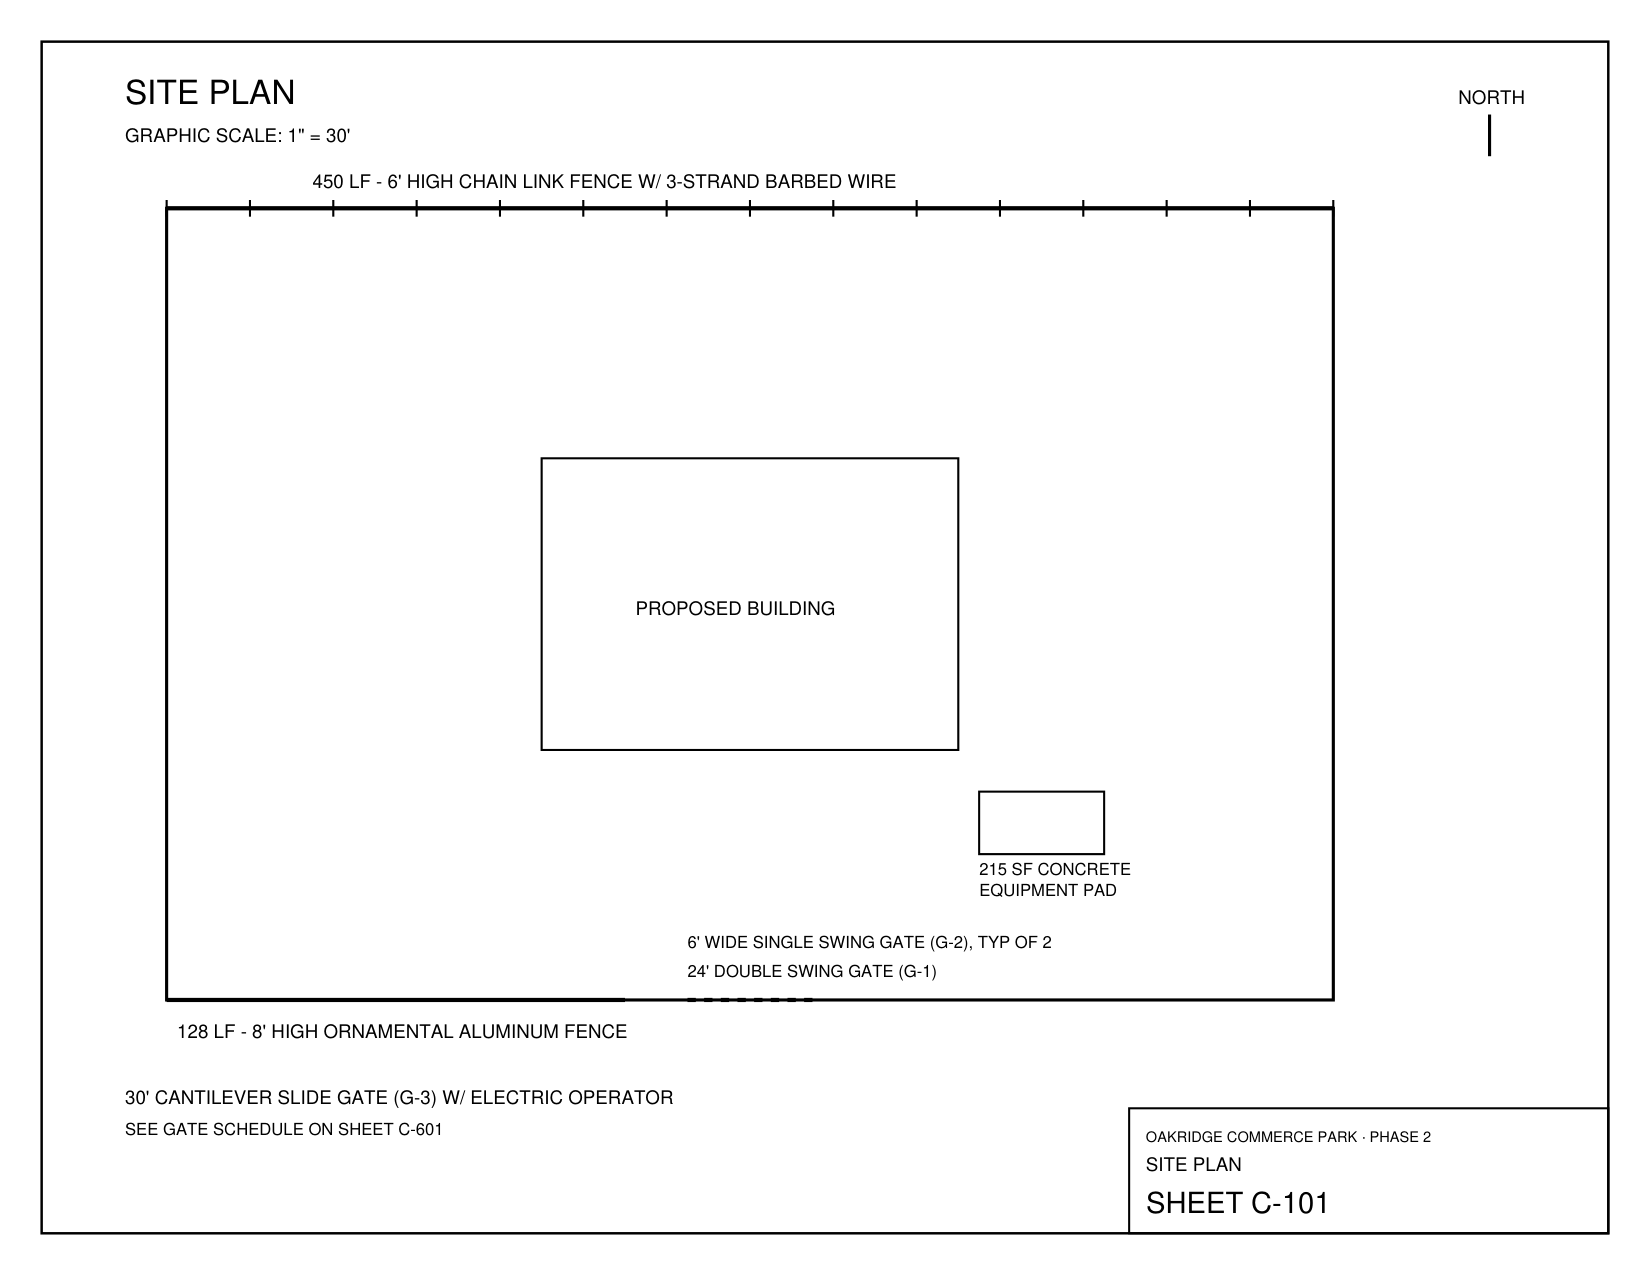
Render a sheet — this PNG is exactly what a vision model gets handed:
conmcp render sample_plan.pdf 2 --out site-plan.png
Other useful commands: conmcp search sample_plan.pdf "chain link gate",
conmcp tables sample_plan.pdf 4 (pulls the gate schedule), and
conmcp instructions --focus fence (prints the takeoff playbook the LLM receives).
3. Connect an MCP client
Wire conmcp into your client — full snippets for Claude Desktop, Claude Code, Cursor, and generic stdio clients are on the clients page. The short version for Claude Code:
claude mcp add conmcp \
  --env CONMCP_ALLOWED_DIRS="$HOME/plans" \
  -- uvx --from git+https://github.com/ContractorKeith/conmcp.git conmcp serve
Make sure CONMCP_ALLOWED_DIRS covers the folder where your plan PDF lives — the server
refuses to read anything outside it (see Privacy & safety).
4. Run a fence takeoff
conmcp registers a fence_takeoff MCP prompt. In Claude Code, invoke it as a slash
command; in Claude Desktop, pick it from the prompts menu — or just ask in plain English:
Run a fence and gate takeoff on ~/plans/sample_plan.pdf using the conmcp tools.
The prompt hands the model the fence playbook: its role ("you are bidding real money — be conservative"), the workflow, and the field-tested gotchas (silt fence is erosion control, not your scope; post spacing comes from the detail sheet, never assumption; check E-sheets for gate operator power; and so on).
5. Watch the tool-call flow
This is the workflow the playbook drives the LLM through:
get_plan_overview— see the sheet index and which disciplines are present.search_plan_pagesfor scope keywords (e.g.fence gate) to find candidate sheets.extract_quantitieson those pages for deterministic callout leads.render_pageon each candidate sheet and read the drawing — measure runs against the graphic scale, follow the fence linetype in the legend, locate every gate symbol.extract_tableson schedule sheets (gate schedules, hardware schedules).- Cross-check general notes, keynotes, and specs against what the plan view shows.
- Build a
TakeoffReportJSON matching the schema, then callgenerate_takeoff_report.
On the sample plan, a good run finds the 450 LF of 6' chain link with barbed wire, the 128 LF of 8' ornamental aluminum, all four gates (G-1 double swing, two G-2 single swings, G-3 cantilever slide with operator), flags the operator's power and loops as "by others" per the general notes, and excludes the silt fence.
6. Get the report
generate_takeoff_report validates the model's takeoff against the
schema and renders it as Markdown for review, CSV for a spreadsheet,
or contractor-bid-compatible JSON:
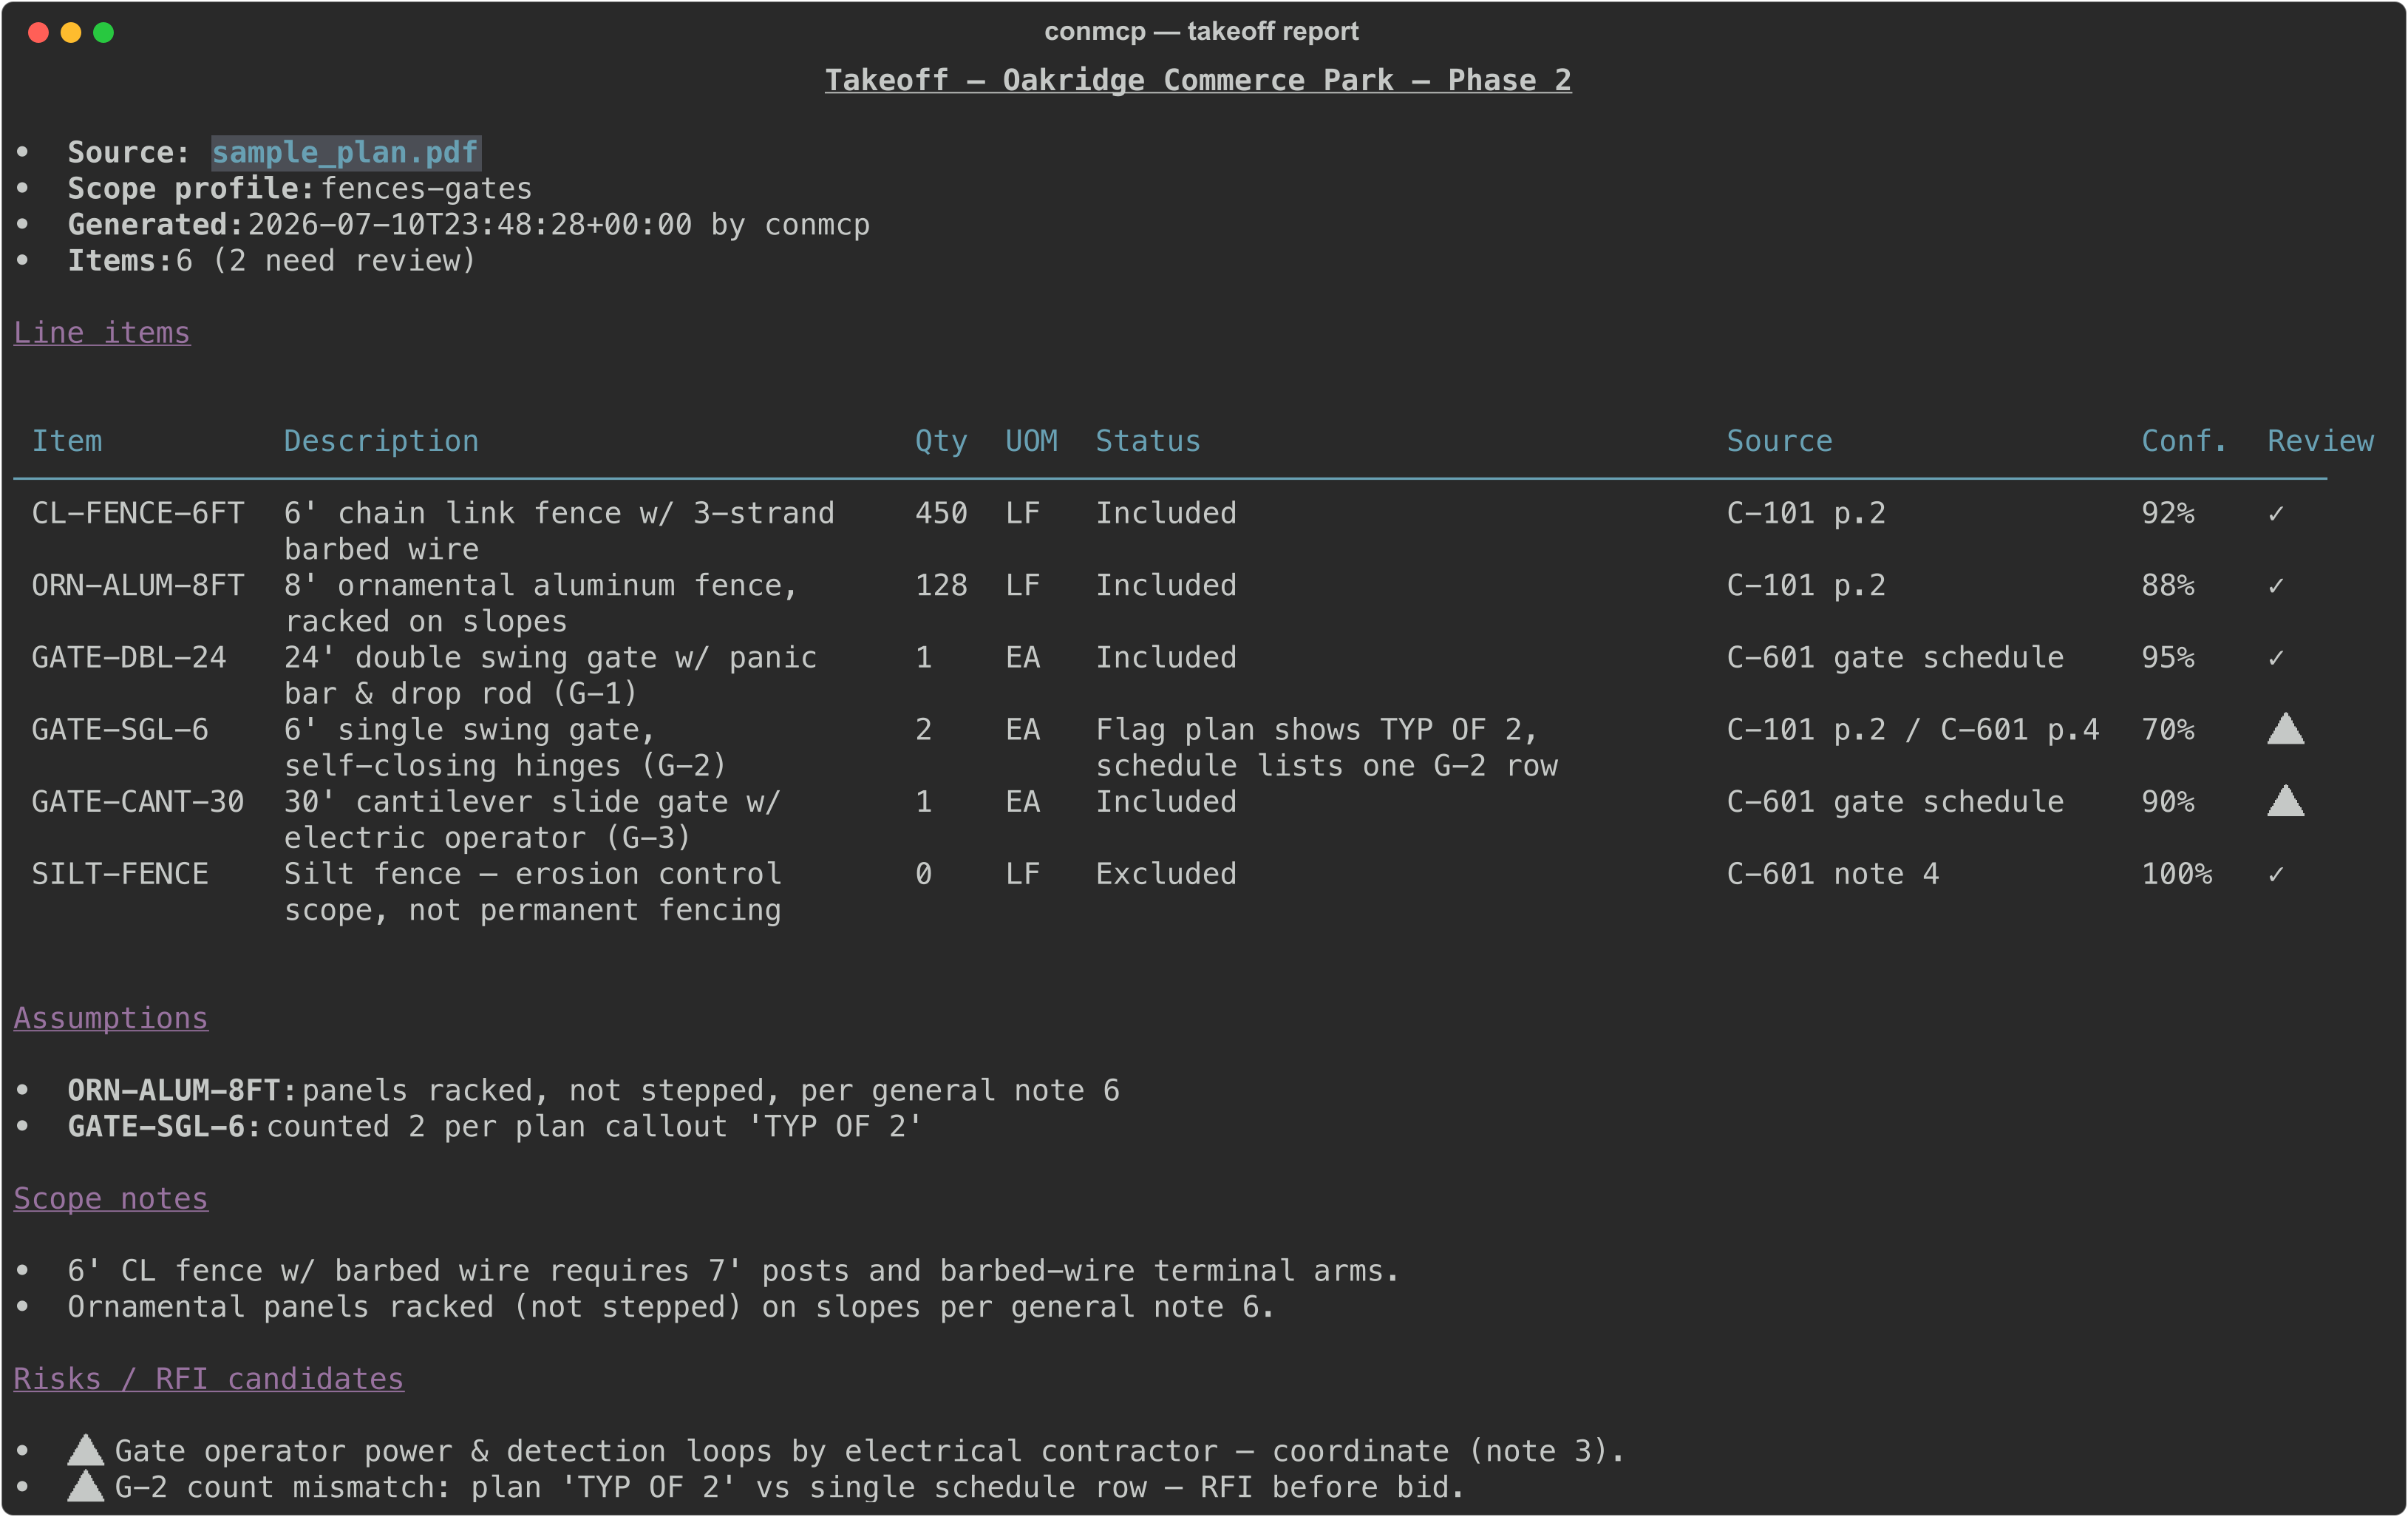
Every line item carries a sheet reference, a confidence score, and a needs_review flag.
Check the flagged rows before you bid — that's the whole point.
Next steps
- Tools & prompts reference — every tool's parameters and payloads
- Takeoff schema — the report contract and export formats
- Privacy & safety — sandbox, audit log, and where your plan data actually goes